Publish to Your Own Cloudflare
This guide shows you how to publish your LocusPilot site to your own Cloudflare account. LocusPilot still manages the site source code. You get a simple publish button and your site runs on your Cloudflare Pages project.
This is also one of the best ways to get a higher Agent-Ready markdown score. Cloudflare can add rules that serve markdown when AI tools ask for it.
1Pick the Right Hosting Path
There are a few ways to host your site. The right one depends on who should control DNS and Cloudflare.
LocusPilot hosting
This is the easiest path. Use the normal Custom Domain guide. For the higher Agent-Ready markdown score, your domain must point through our Cloudflare hosting so LocusPilot can apply the needed rules.
Publish to My Cloudflare
This is the middle path. Your site runs in your Cloudflare account, but LocusPilot still manages the source code and publish button. This guide covers this option.
Full self-hosting
Use this if you want your own GitHub repo and your own Cloudflare build setup. Follow the self-hosted guide.
2Prepare Your Cloudflare Account
- Create or log in to your Cloudflare account.
- If you want the higher Agent-Ready score, add your domain as a Cloudflare Website. This creates a Cloudflare zone.
- Make sure the domain status is active before you publish again.
3Create the Cloudflare API Token
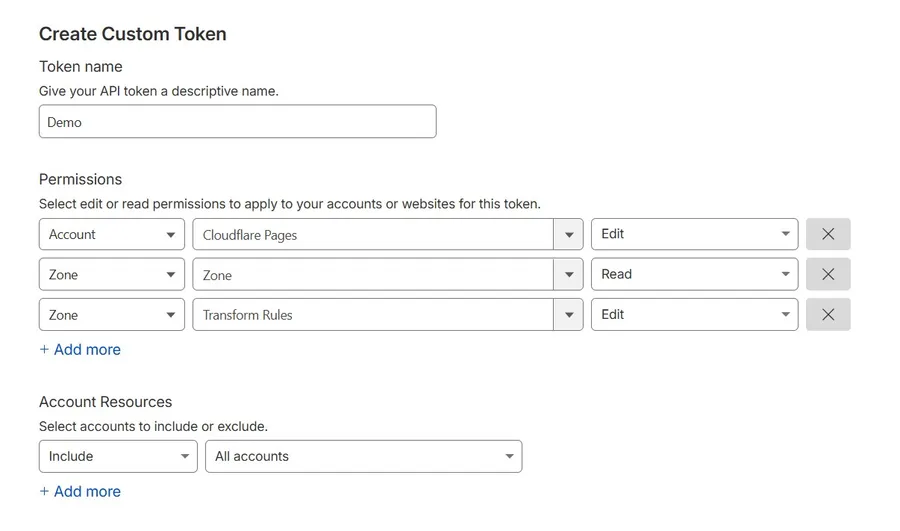
LocusPilot needs a Cloudflare API token so it can create a Pages project, deploy your site, and add the Agent-Ready rules.
| Area | Permission | Level |
|---|---|---|
| Account | Cloudflare Pages | Edit |
| Zone | Zone | Read |
| Zone | Transform Rules | Edit |
4Add Cloudflare in LocusPilot
- Open LocusPilot.
- Go to Settings.
- Open Cloudflare Accounts.
- Click Add Account.
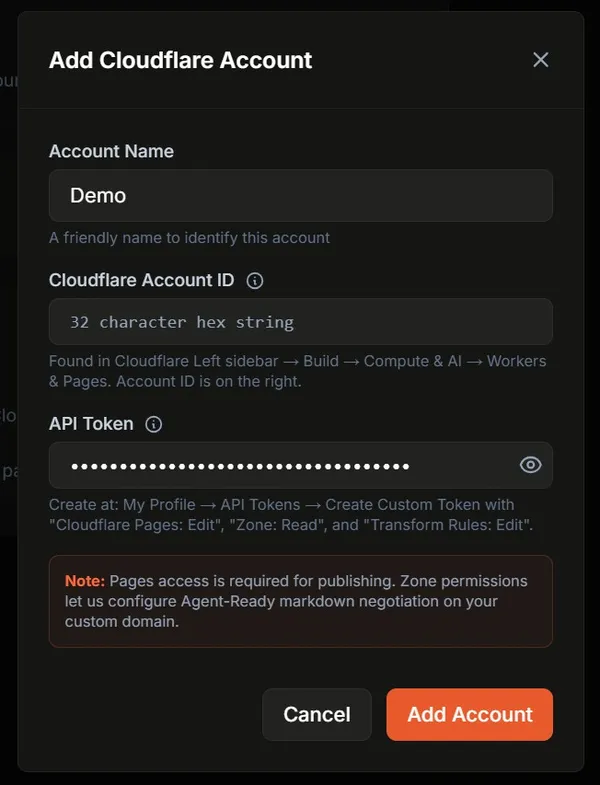
- Enter a name, your Cloudflare Account ID, and your API token.
- Save the account.
LocusPilot checks that the token can access Cloudflare Pages. Zone access is used later when you publish with a custom domain.
5Turn On AI Agent Ready (Optional)
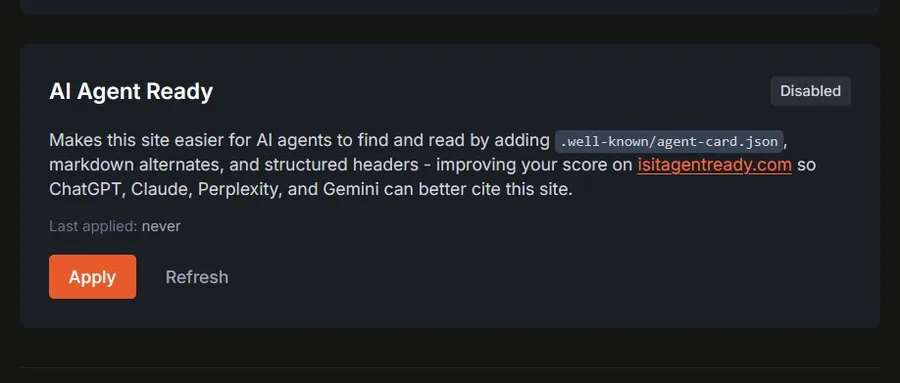
This is optional. Before you publish to your Cloudflare account, turn on AI Agent Ready. This adds the files that AI tools need, such as markdown pages, discovery files, and Agent-Ready headers.
- Open the completed project in LocusPilot.
- Find the AI Agent Ready section.
- Click Apply.
- Wait until the apply step starts or completes.
6Publish from the Project Status Page
- Open the completed project in LocusPilot.
- Find Publish and export.
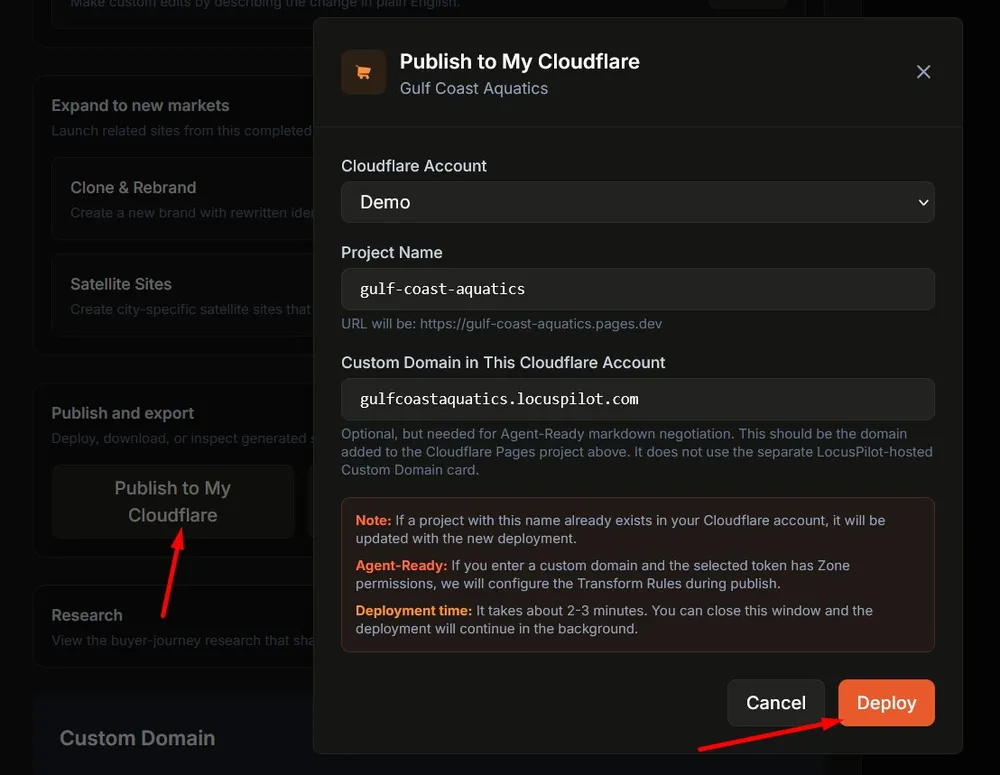
- Click Publish to My Cloudflare.
- Choose the Cloudflare account you added.
- Enter the Cloudflare Pages project name.
- If you want Agent-Ready markdown negotiation, enter your custom domain in the publish modal.
- Click Deploy.
7Connect the Domain in Cloudflare Pages
After the first publish, Cloudflare gives you a URL like your-project.pages.dev. You can then add your real domain inside the Cloudflare Pages project.
- Open Cloudflare.
- Go to Workers & Pages.
- Open the Pages project you published.
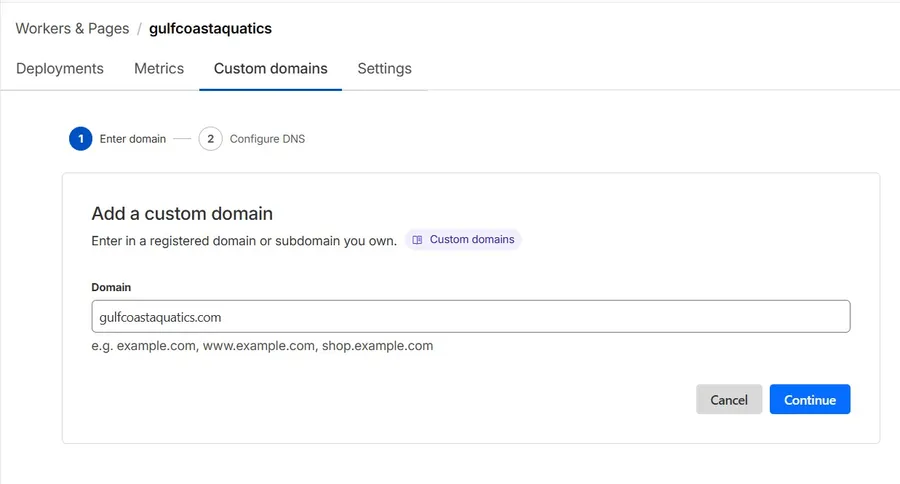
- Open Custom domains.
- Add your domain.
- Follow the DNS steps Cloudflare shows.
- Wait until the domain and SSL are ready.
8Check Agent-Ready Markdown
If Agent-Ready is enabled and the domain is ready, LocusPilot will try to add two Cloudflare Transform Rules during publish.
Good results in the publish modal
- Agent-Ready rules created
- Agent-Ready rules already configured
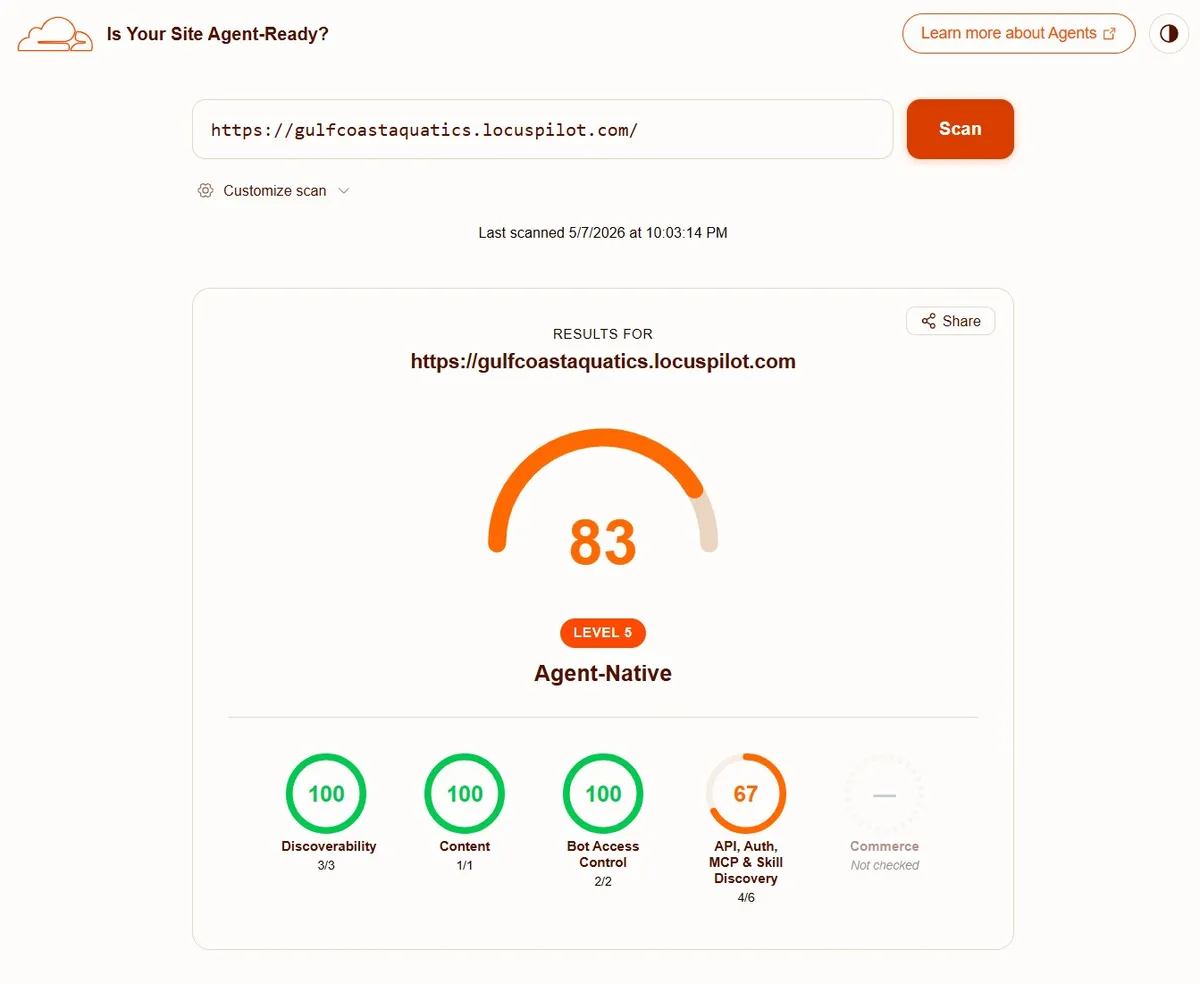
Then scan your domain with your Agent-Ready checker. You can also test from a terminal:
curl -I -H "Accept: text/markdown" https://example.com/A good response should include content-type: text/markdown.
Troubleshooting
Domain zone not found
The selected Cloudflare token cannot see the domain zone. Check that the domain is listed under Cloudflare Websites. Also check that Zone Resources include that domain or All zones.
Token needs more permissions
Add Zone > Zone > Read and Zone > Transform Rules > Edit. Then update the token in LocusPilot settings and publish again.
Site deploys, but the score is lower
The site can still deploy even if the rules fail. Direct markdown files can still work, but AI tools may not get markdown from the normal page URL until Transform Rules are active.
Where to see the rules in Cloudflare
Open the domain zone in Cloudflare. Go to Rules > Transform Rules > URL Rewrite. You should see two rules for Agent-Ready markdown.