Edit Your Source Code with AI Tools
The dashboard editors are great for small fixes like typos, swapping an image, or tweaking colors. For anything bigger (a brand-new section, a custom calculator, site-wide refactors), you'll want to download the source and edit it on your own computer with an AI coding tool like Cursor, VS Code, or Claude Code.
This guide shows you the full round-trip: download, edit, reimport. Every reimport saves a version, so you can always roll back if something breaks.
1Download your source code
Open your project, click Source Code on the project page, then Download Source ZIP. Unzip it anywhere on your computer.
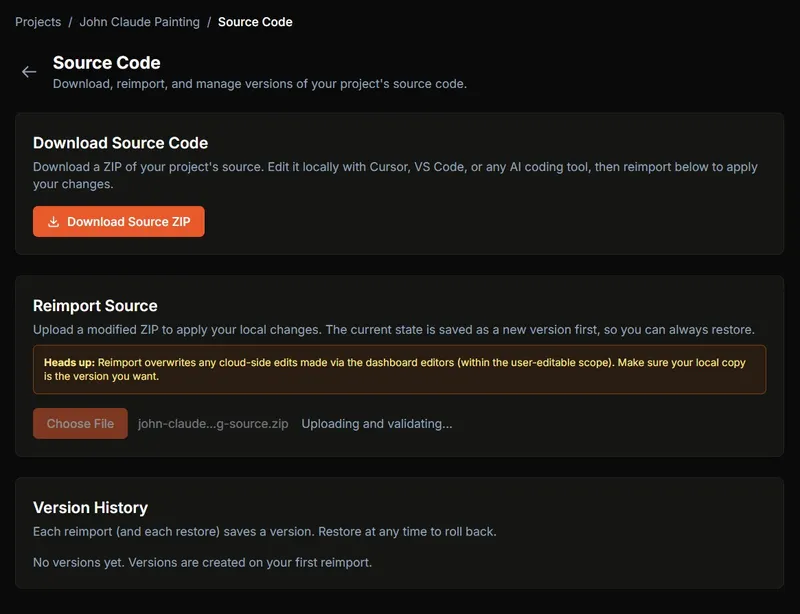
Inside the ZIP you'll get the parts you're allowed to change:
src/: every page, component, and content filepublic/: images and static assets.data/: your business factsheet, site config, generation summary- Root config files:
package.json,astro.config.mjs,tailwind.config.mjs,tsconfig.json
If your project has satellite (town) sites, you'll also see:
towns/: per-town folders. Each town has its brief, config, services, blog, and assets, all editable.tools/: a small build script that compiles each town into its own static site
2Edit locally with an AI coding tool
Open the unzipped folder in any modern editor. AI tools that understand the whole codebase work especially well:
- Cursor: AI-first editor
- Claude Code: terminal-based AI assistant
- VS Code with GitHub Copilot or another extension
- Google Antigravity: Gemini 3 IDE
Things AI tools handle well in this codebase:
- Add a new page section (testimonials slider, video hero, FAQ accordion)
- Build a custom interactive tool (mortgage calculator, lead form)
- Translate a page to a new language while keeping the layout
- Site-wide tweaks (update the copyright year, swap an icon set)
npm install once, then npm run dev. Your site opens at localhost:4321.3Reimport your changes
When you're happy with your edits, zip up the folder again and upload it on the same Source Code page under Reimport Source. A few things happen automatically:
- The upload is checked for required files (
package.json,astro.config.mjs,src/) so a broken ZIP can't take your site down - A hidden metadata file confirms the ZIP belongs to this project, so uploads from a different project are rejected
- Your previous state is saved as a new version before we apply your changes
- Cloudflare Pages rebuilds your live site automatically (2-5 minutes)
What gets touched on reimport
Only the files you can see in your downloaded ZIP are replaced. Anything else on the cloud side is left alone.
Replaceable on reimport
src/public/.data/(subset)- Root configs (
package.json, etc.) towns/andtools/(satellite-site projects)
If you remove a blog post or page locally, that deletion does get applied. Files in your editable scope that are missing from the upload are deleted on the cloud side too. That keeps the cloud and your local copy in lock-step.
4Track versions and restore at any time
Every reimport (and every restore) creates a row in Version History at the bottom of the Source Code page. After your first reimport you'll see two rows: the original state and your new upload.
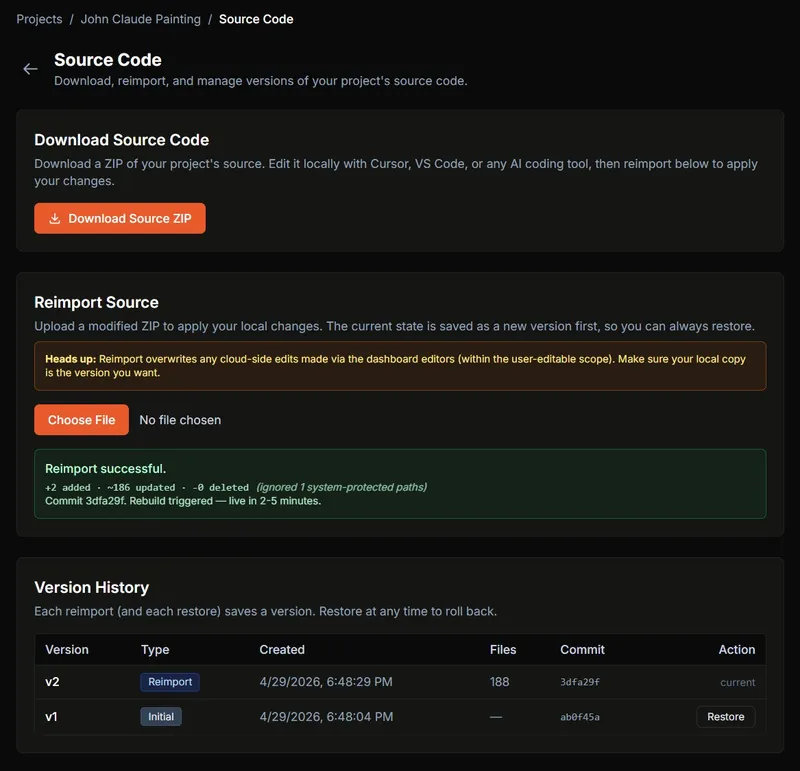
Each row shows what kind of version it is, when it was made, how many files changed, and a short commit reference. Click Restore on any older version to roll the live site back to that exact state. Restoring also creates a new row, so you can always undo the restore.
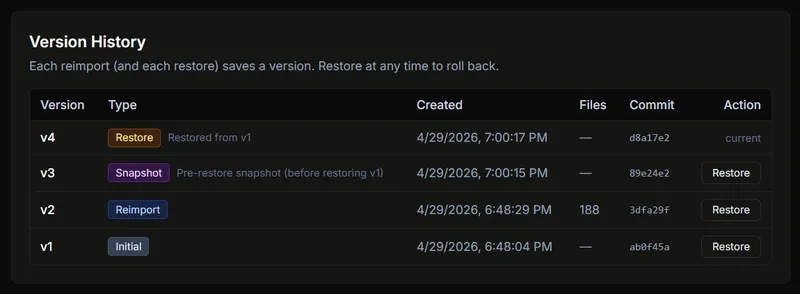
Version badge meanings
- Initial: the state right before your first reimport
- Reimport: created when you upload a new ZIP
- Restore: created when you roll back to an older version
- Snapshot: created automatically if there are dashboard-editor changes that aren't already tracked (see step 5)
5The untracked-changes warning
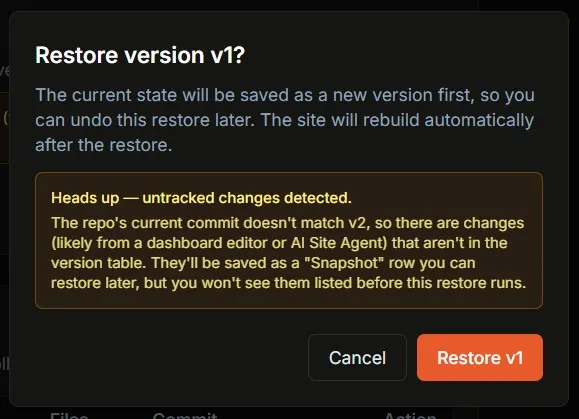
The dashboard editors (Image Manager, Blog Editor, Theme, AI Site Agent) save directly to your project. They don't create version rows. If you use one of those between reimports and then click Restore, we don't want you to silently lose that work.
That's what the yellow warning in the restore confirmation is for: it appears when the live site has changes that aren't in your version history yet.
Troubleshooting
"Reimport rejected"
- Make sure the ZIP contains
package.json,astro.config.mjs, and asrc/folder at the top level - The hidden
.data/.lp-project.jsonfile must be present. Re-download a fresh source ZIP and re-zip from there if it's missing - If you tried to upload a ZIP from a different project, you'll get a hard reject with both project names. Use the matching project's Source Code page
Upload size exceeds the limit
- The default cap is 50 MB. Most LocusPilot sites are under 10 MB, so this usually means you accidentally zipped
node_modules/or thedist/folder - Re-zip and exclude
node_modules/,.astro/,dist/, and.git/
Reimport succeeded but the site didn't update
- Cloudflare Pages takes 2-5 minutes to rebuild after a reimport. Hard-refresh your live site after a few minutes
- If the success banner shows Auto-deploy failed, click Publish Now to retry the rebuild manually
Version History is empty after reimport
- This usually means the version-tracking table hasn't been set up on your account yet. Contact support and we'll apply the one-time migration
- Your reimport itself still worked; the rebuild and the new commit are in place
My local changes broke the build
- Open Version History on the Source Code page, find the last working version, and click Restore
- Cloudflare Pages keeps the previous successful deploy live until a new one succeeds. Your visitors won't see a broken site, they'll just see the old one until you fix the build